I have seen Lopi patterns and yarns around quite a lot and been curious about them, but have never worked with them myself. I’d seen the yarn in different shops and thought it came in such great colors, but every time I touched it it put me off. So hard and scratchy! Having been used to softer yarns, the Lopi didn’t impress me at all. I couldn’t get my head around why anyone would want to work with it, much less wear it! Still, I also knew that there were some gorgeous Lopi patterns out there and that a lot of people seemed to love them on Ravelry. So, what on earth was I missing? I had no idea, but there had to be something.
As luck would have it, a few weeks ago I was commissioned to make a Lopi project for a photo shoot (for a popular women’s magazine here in the Netherlands), so I finally got my chance to try this stuff out for myself… AND I was getting paid to do it. WIN WIN!
They wanted the Himinn shawl (page 16 in book #33) in a cream color. Ok, sounds like something I could do easily enough. When they first phoned and I heard “Less than two weeks” and “Lopi” in the same sentence a little panic set in. If you’ve ever seen some of their other patterns there is a lot of color work that would slow things down pretty dramatically. This was all done in a single color in garter stitch, so I was pretty confident I could get it done in time to send it out.
There was just one problem… this:
In the book there are two different version of the cardigan in the book. The red one is shorter, smaller and more fitted and the blue one is longer, overlapping and belted. Now here’s where things get confusing! The pattern gives you two different options for yarn: Ístex Plötulopi held double (seen in blue photo) or Ístex Álafoss Lopi single stranded (seen in red photo, this is the yarn I had). When I first read that, I thought “AHA! So that’s the difference!”. I assumed that the difference in the yarn accounted for the difference in the outcome of the size of the sweater… but no, then I realized they both have the same gauge!
So, reading that, one can assume that both yarns, having the same gauge would knit up to basically the same finished product, no?
Then I had a look at the sizing. I had very little info go to on for the model that would be wearing it for the photo shoot. Not the fault of my client, of course, they could only go by what the magazine told them… but it made an already confusing situation a bit more difficult. First they said they “think she’s about a size 38″… then a few days later I got her bust measurement and arm measurement. Where was I to go from there with this pattern?
I knew they were very adamant that they wanted the sweater to come out looking like the red one. So what I didn’t know was – is the girl in the red sweater a size large in a size large sweater, and the girl in the blue a size small in a large sweater? Is the girl in the red sweater a size large in a small sweater and the girl in the blue is a size large in a large? WHAT IS GOING ON WITH THESE TWO SWEATERS! It was not easy to judge from the measurements given in the pattern, which included bust size, length of body to armpit and arm length to armpit. Again, no idea how tall these models in the photos are.
In the end I decided to make sure I had the right gauge, take my best guess at the size based on the measurements I was given, start knitting and see how it worked out!
This is when Susan Lucci started making herself useful finally! The cardi was knit from the bottom up in five separate pieces – two side pieces, back piece and two sleeves. They were all knit flat and then attached at the armpit level before knitting the yoke. When I had the first part of the front finished I ran into our spare room to try it on Susan Lucci. I knew that the model had a bust size just a smidge smaller than the smallest setting, so if it fit SL it would fit her (I hoped). At this point I was skeptical. A part of me wanted to tear the whole thing out and start over with the large size, but I had to remind myself that there was still the blocking to go. It just looked so darn small!
Oh the plus side, I definitely had my answer in regards to which version of the sweater it was going to work out to be. Not only was it small like the red version, I was starting to wonder if it was going to be too small. I ground my teeth and forged on, pushing down the dreadful feeling that I should start over. Seriously, if second guessing myself were a skill, I’d be selling those goods on Etsy and MAKING IT RAAAIN!
I was feeling a bit more confident once I had the pieces together. Not totally confident, as I still worried about it being too small, but it didn’t feel as incredibly small as it did when I was just looking at the one piece. I have to say, though, that the assembly at this point was when I started getting excited about the project. Seeing it start to look like a sweater, rather than just this endless set of squares, was great. The only down side at this point was having the entire sweater on my lap as I worked on it. Let me tell you, it’s hot, it’s like surface of the sun kind of hot. I can’t imagine this is something you’d want to wear indoors for long. Maybe more like… outside while shoveling snow. I can see why people in colder climates knit with this kind of wool. I don’t see you needing a winter jacket if you own a sweater made from this yarn.
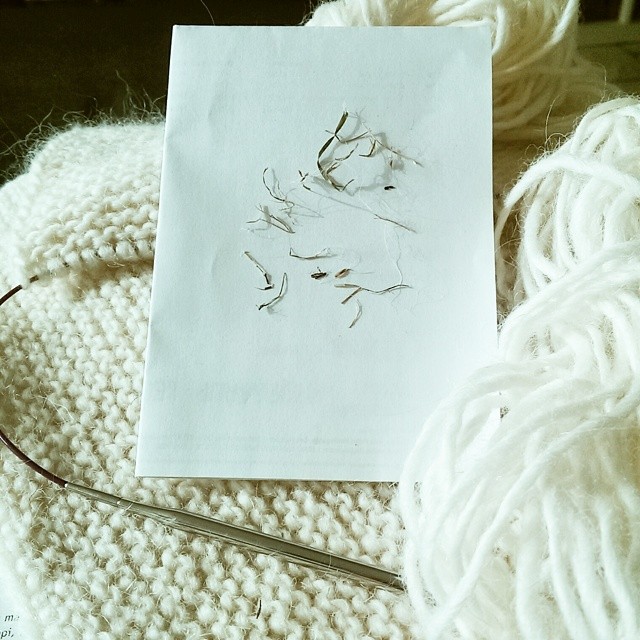
Another note on the yarn since I’m on the subject, and it’s something I think may irritate a lot of people, but I loved it… The entire time I was knitting I was picking out little pieces of grass, straw and twigs. I felt like it should bother me, that I should be annoyed by it, but I wasn’t at all. In fact, it had the opposite effect. I felt so much more connected to the wool’s origins. I mean these were pieces of ICELAND I was picking out of my yarn, that were carried to me straight from the sheep!
How cool is that? A Canadian girl, sitting on my sofa in the Netherlands, knitting a sweater for a Dutch magazine, picking out pieces of Iceland from my wool. I am a woman of the world! It’s the closest I’ve been to Iceland since the few hours I spent sitting in the Reykjavik airport on my way to Canada, and much more enjoyable!
Also, and this part was a little less pleasant but still tickled me in a weird way. Even though I used approximately a truckload and a half of lavender scented Eucalan during the blocking process? There was no getting the wet sheep smell out of this yarn. Between the rainy weather and this sweater laying wet on the blocking boards, the smell of wet sheep and dog made me feel like I was living on a farm, rather than in my little flat in the city. It was kind of nice!
Right, ok… let’s get back on track. I skipped straight from the halfway assembly to blocking.
Knitting the yoke of the sweater was not that difficult, just cumbersome. It was quite heavy and bulky so whenever you had to turn the work it was a bit of a chore. The actual shaping and knitting itself was fine and seemed to go by rather quickly. The longest and most tedious of the project was the sleeves, I think. When I had the yoke completed I went back to Susan Lucci to see how we were doing. I closed the sides and sleeves up with stitch markers and put it on and it looked like it was coming along nicely.
It really was starting to look like the photo in the book and I must say I was pretty proud of myself at this point. Most of all? I was thankful that the sizing and model worked out in regards to the two different versions of the sweater.
I found that while the sleeves were the longest and most monotonous part of the project, the part I enjoyed the least was the assembly at the end, sewing up the seams. I think this was my own fault, though. I really hate how edges look when knitting in garter stitch, and really didn’t want it to look like that at the front opening. So I slipped the first stitch in every row and purled the last. This makes for a much nicer edge, in my opinion. Unfortunately, that didn’t really help with the assembly at the sides. The increasing and decreasing for the waist all takes place at the beginning and end of the rows, so at the sides it made for a more difficult edge to sew together than if I had just done the regular garter stitch edge. It was great for the front and the edge of the collar, it just isn’t good for an edge that needs to be seamed. I think I did the seam of the first side about five times. Sewing it up one way, ripping it out, trying another way, ripping it out. In the end I’m not sure if I ripped out more seams or hair… and we all know I need all the hair I have!
The collar was pretty easy, thanks to my obsession with stitch markers.
No matter how much I knit, I just cannot let go of my need for a marker for ALL THINGS.
Increase? MARKER!
Decrease? MARKER!
Short row? MARKER!
Sleeve? MARKER!
Not only am I obsessed with using markers, but I have a weird need to use the same color for the same thing. The shape doesn’t matter but if I tried to use a purple marker in amongst all these green ones, for the same purpose? ** Twitch ** I just couldn’t do it.
This isn’t just me, right? I feel like the markers are like the training wheels of knitting. As though I should be able to ride without them at some point, but I simply don’t want to. I need them. I need them in every shape and color that exists.
So back the sweater (again), I finished it with a bit of time to spare and it turned out great, if I do say so myself!
Blocking was a bit of a chore since it soaked up water like you wouldn’t believe. Not only was it hot, it was heavy! I eventually gave up on trying to squeeze water out and ended up having to layer about six towels to roll it up in and walk on it to get the water out. Even then the towels were drenched!
In the end it didn’t stretch out as much as I thought it would in blocking, so the size was pretty much the same as it was before. For example, the length from the bottom to the armpit on the side, for the size I made, was 37cm and I JUST made it. I mean I just made it with some tugging and stretching during the blocking process. See the measuring tape at the bottom? That was put there to mark the length so I could go back later and see if the sweater shrunk back up – and it did! More than once I had to go in and smooth it out and gently stretch it to the required length again.
Again, it left me wondering… if both yarns had the same gauge, and this was the medium size and I barely made the 37cm in length… the next size up was only 40cm in length. How on EARTH do you make the blue cardigan? Either that model is a little person or there is some trick that isn’t mentioned in the pattern. Very, very confusing and didn’t leave me loving the pattern. Love the product, but I do think the pattern could have been a bit (ok, a lot) clearer in the description regarding the two different looks.
It took a full three days to dry properly all over. The area around the collar taking the longest time to dry. I found that it went quicker after I moved it from the blocking boards to a wire rack where it could get air properly from the bottom as well.
All that said? I really loved this project. I loved the frustrations as much as the easy parts because they were all such great learning experiences. Dealing with sizes that aren’t my own, working with an unfamiliar pattern with challenges I’ve not encountered before, and working with yarn that I probably never would have considered buying myself. It was great and it really changed my opinion of the Lopi yarn. It may not be as soft as other yarns I used but soft squishy yarn aren’t the only ones that have something to offer. Granted, this sweater WAS itchy and it’s not something I’d ever wear against my bare skin but it was warm and lovely to knit with. I have seen some truly beautiful Lopi patterns and this project as made me quite keen to try another, especially one of their really intricate color work patterns..
It has been sent off to the client and they were really pleased with it. Now we just have to wait to find out how it worked for the photo shoot. I’m hoping that it fits well and I can eventually come back with a photo from the magazine to show off! Fingers crossed!


Absolutely GORGIOUS. I may commission you ;-) Though I think my skin would rash from the Lopi… is it soft?
(PSSSST, what magazine?)
Groetjes!
I won’t say what magazine just yet, but I will post as soon as it shows up. I’m dying to know if it fit and how the photo shoot went! The Lopi yarn is definitely scratchy. It’s weird, it’s soft but itchy, know what I mean? It’s much softer to the touch after soaking than it is when you feel it in the shop, and it’s soft and squishy but it prickles through your t-shirt, for example. That was the Alafosslopi, I hear the LettLopi is quite the same. I’m curious to try the unspun wool they have and see how that is! I am always up for more knitting jobs :)
That’s a beautiful sweater. I hope to see the magazine shots soon! :)
I just LOVE this blog post! It is so interesting to see this product being made from start to finish. Also, now I desperately want to learn how to knit garments! ;)
xo,
wink
Thanks Wink! I really need to get off my butt and blog more. You can -totally- knit garments, I’m sure of it. If you can crochet, you can knit! Especially with all the great YouTube tutorials out there!